Ultimate Guide to Creating Custom iPhone Skins (2026)
Ultimate Guide to Creating Custom iPhone Skins
Custom iPhone skins are now one of the most sought-after accessories for people looking to personalize and safeguard their gadgets without the bulk of a typical phone case. No matter if you’re a keen hobbyist who has an Cricut machine, or you run a business making hundreds of skins per month, your success is contingent upon the use of accurate designs, top-quality materials and the correct production method.
This complete guide will explain the steps involved in making professional iPhone skins, starting with choosing the appropriate template, to creating cutting, weeding placing, and selling your final products.
What Is a Custom iPhone Skin?
Custom iPhone skin is a fine cover made of adhesive that has been specifically cut to fit the specific iPhone model. In contrast to cases for phones that cover the phone, skins preserve its thin appearance and provide the protection from scratches, fingerprints and wear.
Customized skins could include:
- Solid colors
- Carbon fiber texture
- Matte finishes
- Gloss is finished
- Wood grain patterns
- Marble designs
- Corporate logos
- Sports-related themes
- Animation art
- Names that are personalized
- Customized graphics
Why Custom iPhone Skins Are So Popular
The need for personal accessories will continue to increase as consumers need products that reflect their personal style.
The benefits include:
- Slim design
- Protection against scratches
- Installation is simple
- Lightweight
- A myriad of design possibilities
- Flexible customization
- Removal is easy without damaging the device
For companies, custom skins can be used to create distinctive products with high profits opportunity.
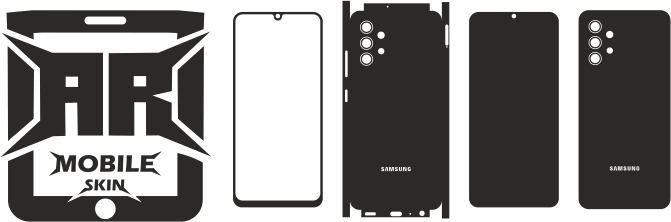
Step 1: Choose the Correct iPhone Skin Template
The base of any flawless skin is a precise model.
Each iPhone model needs a specific template, as camera layouts, as well as button positions vary.
Examples include:
- iPhone 17 Pro Max
- iPhone 17 Pro
- iPhone 17 Air
- iPhone 16 Pro Max
- iPhone 16 Pro
- iPhone 15 Pro Max
- iPhone 14 Pro
- iPhone 13 Pro Max
The wrong template could result in poor alignment and wasting vinyl.
Step 2: Select Your Design Software
Professional designers usually utilize vector-based applications.
Some of the most sought-after options are:
- Adobe Illustrator
- CorelDRAW
- Cricut Design Space
- Silhouette Studio
- Inkscape
- FlexiSign
- SignMaster
Vector graphics guarantee crisp, flexible designs that ensure cutting-edge accuracy.
Step 3: Create Your Artwork
Once you have opened the template, modify it to your liking.
Popular styles include:
Minimalist
Simple solid colors and an elegant appearance.
Carbon Fiber
The premium texture is still one of the top-selling choices.
Marble
Gorgeous stone-inspired patterns.
Wood
Natural and natural-looking finishes that appeal professionals.
Gaming
Illustrations of characters, RGB themes as well as Esports-themed graphics.
Luxury
Leather, silver, gold as well as metallic texture.
Personalized
Names, initials or logos that are custom.
Step 4: Choose High-Quality Vinyl
The choice of the material influences the look and longevity of your skin.
The most recommended options are:
- Matte Vinyl
- Gloss Vinyl
- Carbon Fiber Vinyl
- Brushed Metal Vinyl
- Leather Texture Vinyl
- Satin Vinyl
- Transparent Vinyl
- Holographic Vinyl
The premium cast vinyl is usually sought-after because it is well-adjusted to curves and gives durable performance.
Step 5: Prepare Your Cutting Machine
The most popular cutting machines are:
- Cricut Maker
- Cricut Explore
- Silhouette Cameo
- Graphtec CE Series
- Roland CAMM-1
- GCC Expert
- Summa
- Mimaki
Prior to cutting:
- Cleanse the machine.
- Make sure you have a sharp blade.
- Change the pressure settings.
- Do a tiny trial to cut.
- The vinyl should be loaded correctly.
These easy steps will make it easier to reduce production mistakes.
Step 6: Cut the Vinyl
Design the image and send it to your cutting machine.
To get the most effective results, follow these steps:
- Make sure you use the right blade thickness.
- Choose the appropriate cutting speed.
- Set the pressure to match the type of vinyl.
- Always cut test when you are working with a brand new material.
Achieving precision in cutting results in cleaner edges, which makes the following steps much easier.
Step 7: Weed the Excess Vinyl
Weeding refers to the procedure of getting rid of the unwanted vinyl from the cut after it has been cut.
The most useful tools are:
- Tweezers with precision
- Hook for Weeding
- Craft knife
- Fine-point pick
Begin slowly with:
- Camera openings
- Cutouts of the logo
- Button buttons
- Small corner details
Being patient can prevent any damage to your skin.
Step 8: Prepare the iPhone
A clear surface is vital for adhesion that is strong.
Before installation:
- Get rid of any old skin.
- Cleanse with Isopropyl alcohol.
- Get rid of fingerprints and dust.
- The surface should be allowed to be completely dry.
Inadvertently omitting this step could cause the formation of bubbles or lift.
Step 9: Apply the Skin
Beginning with the most extensive section, typically the back panel.
Professional tips to finish your project:
- The camera’s opening should be aligned first.
- Start slowly, starting from one edge.
- Utilize a felt squeegee eliminate air bubbles.
- Make sure you are positioned correctly if required.
- Use gentle heat only if suggested by the manufacturer of vinyl.
Beware of stretching the vinyl because it could cause distortion to the fitting.
Step 10: Inspect the Final Product
Be sure to inspect the skin thoroughly before giving it to a client or sending it to them.
Find:
- Straight align
- Smooth edges
- A bubble-free, smooth finish
- Proper camera fit
- Cutouts of the clean button are available.
- Adhesion that is secure
An inspection of quality at the end helps to maintain the professional image of the company.
Common Mistakes to Avoid
A lot of beginners make these obnoxious error-prone
- Making the wrong choice of template
- The purchase of low-quality vinyl
- Avoiding the cut of the test
- The application of vinyl on a dirty phone
- Extending the material
- Utilizing sharp blades
- Inattention to machine calibration
Resolving this issue improves the consistency of your work and decreases waste.
Tips for Businesses
If you are selling custom iPhone skins, take note of these guidelines:
- Templates can be organized by models.
- Stock extra blades.
- Test new vinyl brands before production.
- Provide a variety of textures and finishes.
- Securely package skins.
- Include installation directions.
- Provide excellent customer support.
The small changes can lead to clients to return.
Frequently Asked Questions
What can I do to make iPhone skins using a Cricut?
Yes. Cricut Maker as well as Cricut Explore machines are commonly utilized to cut iPhone skins out of SVG template.
Which format for files is the best?
SVG is perfect for Cricut users. AI as well as CDR can be used to use for design projects that require professional expertise.
What is the most durable vinyl?
Cast vinyl of high-quality generally provides greater quality, durability, and flexibility as well as longevity.
Do I have the ability to create my own design?
Yes. Templates can be customized with the logo, graphics designs, colors and patterns by using vector software for design.
Do I require professional experience?
No. Beginning users can design top-quality skins using precise designs, top-quality materials as well as following a standard process.
Conclusion
Making customized iPhone skins can be a satisfying talent for both hobbyists and companies. With precise templates, top-quality vinyl, reliable cutting tools, and meticulous methods of installation, you are able to make skins that look like professional, and are perfectly sized for.
Since the demand for personalised smartphones continues to increase investing the time to learn the full workflow can help your business to provide superior products, gain confidence in your customers, and build an effective mobile skin company.