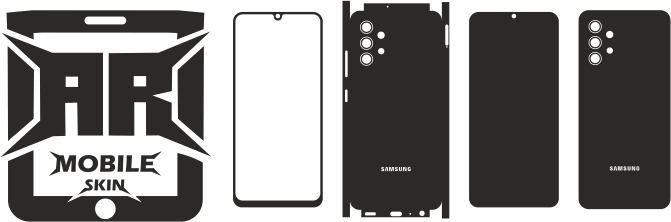

Camera Skin Template Design Best Practices: How to Create Accurate, Professional Vinyl Templates
The process of creating a template for a camera’s skin does more than trace the shape of the camera. Professional templates need exact measures, a thoughtful design and a lot of testing to ensure that they are in sync with the functionality of the camera.
If you’re creating template designs to use in your personal designs or promoting them on VectorCuts Following the best practices for design will enhance the quality of your work, decrease waste material as well as increase satisfaction of customers.
This guide outlines the most effective methods used by professional templates designers who create professional templates for camera skins.
Why Design Quality Matters
An appropriately designed template has many advantages:
- Precise fit
- Simple installation
- Straight lines
- Better customer experience
- Reduction of vinyl waste
- Less support requests
Incorrectly-designed templates could lead to misaligned cutouts, issues with installation and reviews from customers.
Start with Accurate Measurements
Each successful template starts with precise measurement.
The following are the measurements:
- Camera body dimensions
- Grip lines
- LCD screen
- Viewfinder region
- The battery compartment
- Door to memory cards
- Port openings
- Function buttons
- Dials
- The Tripod socket is located
Make use of a digital caliper as often as it is possible to achieve the best accuracy.
Design for Functionality
Camera skins should not be used to interfere with normal operations.
Be sure to leave enough room about:
- Buttons
- Dials
- Touchscreens
- Hinged doors
- Batterie compartments
- Memory card slot
- The HDMI and USB ports
- Speakers and microphones
It is essential to prioritize functionality above appearance.
Minimize the Number of Template Pieces
Too many separate pieces make installation more difficult.
Instead:
- As many flat sections as feasible.
- Eliminate seams that aren’t needed.
- Manage complex shapes.
- Install the system in a way that is intuitive.
An aesthetically balanced design enhances the usability as well as appearance.
Follow Natural Body Lines
If possible, place seams parallel to:
- Existing panel gaps
- Body Edges
- Natural curves
- Hidden transitions
The final skin appear more like a factory accessory.
Allow for Material Tolerance
Vinyl reacts differently based upon:
- Thickness
- Stretch
- Type Adhesive
- Temperature
Beware of creating templates that are too rigid. A smaller tolerance will ensure an easier installation.
Keep Vector Paths Clean
Use clean, simple vector paths.
Avoid:
- Anchor points that are too strong
- Curves that are jagged
- Paths that are duplicates
- The objects that overlap
Pathways that are well-organized cut more quickly and give better results.
Organize Layers Professionally
If you are using Adobe Illustrator or similar software you can organize your document in separate layers.
Structure suggested:
- Images of reference
- Cut lines
- Fold guides
- Notes
- Register marks
- Preview art
Clean file structures make the future update process much simpler.
Design for Multiple Vinyl Types
Different materials react differently.
Your templates must work with:
- Matte vinyl
- Gloss vinyl
- Carbon fiber vinyl
- Vinyl with leather texture
- Vinyl printed on paper
Tests on multiple materials increase the reliability.
Test Every Template
Don’t release a template before doing some testing.
The recommended testing procedure:
- Print directly on white paper.
- Check the alignment.
- Cut with inexpensive vinyl.
- Set up the camera.
- Make sure that all openings and controls are closed.
- Adjust as needed.
Testing is among the crucial steps of the design of templates.
Include Installation Guides
Let customers get more effective results through providing
- Instructions for installation
- Alignment tips
- Surface preparation guidelines
- Tools that are recommended
- Care tips
Documentation that is clear reduces support calls and increases customer satisfaction.
Export in Multiple Formats
Help support a variety of clients, including:
- SVG
- AI
- EPS
- DXF
- Guide in PDF
Different file formats make it easier to work with different cutting tools and design programs.
Create High-Quality Preview Images
Professionally designed previews help buyers to understand the product they’re purchasing.
Include:
- Layout of flat template
- Photos of skins that have been installed
- Close-up details
- Multiple viewing angles
- The color choices available
Strong visuals can improve conversion rates.
Keep Templates Updated
Manufacturers of cameras regularly launch new models.
Check your catalogue regularly to:
- Include new cameras
- Make changes to templates already in place
- Improve older designs
- Replacing outdated preview images
An updated and regularly revised catalog increases trust among customers.
Common Design Mistakes
Don’t make these mistakes frequently:
- The measurements are only for the outer dimensions.
- Inattention to curves
- Blocked ports or buttons
- In addition, it creates unneeded seams
- Inadvertently testing prototypes
- Utilizing low-quality images as reference
Making mistakes and learning from them helps to create improved templates.
Build a Consistent Product Library
As your collection grows:
- Make sure you use consistent name conventions.
- Organise your products based on name.
- Templates for groups by camera.
- Keep track of the version.
- Store editable master files.
The consistency of the catalog makes it easier to manage and also improves the user experience.
Why Professional Templates Stand Out
The professionally designed templates of AR Mobile Skin emphasize:
- Accurate measurement
- Clean vector paths
- Cutouts for functional purposes
- Installation is simple
- Multi-format compatibility
The attention to detail differentiates top templates from the basic design.
Conclusion
The creation of a professional template for a camera’s skin requires more than just technical expertise. It involves careful planning, precise measurements, a clean vector design and careful tests. Following these top practices it is possible to develop templates that are easy to set up as well as reliable and satisfy the needs of both vinyl and photography businesses.
If you’re creating your personal library of templates or operating a marketplace, investing in top-quality designs will strengthen your brand and help support expansion of your business.
Frequently Asked Questions (FAQs)
Which is the single most crucial element of creating an image skin template?
The accuracy of measurements is the basis of all successful templates. Any small error can impact quality and functionality.
Why should I keep vector paths simple?
The clean vector paths cut with greater precision and speed up machine processing They are also more simple to modify later.
Should I test every template before selling it?
Yes. testing on both vinyl and paper aids in identifying alignment or fit issues prior to customers using the templates.
Which file formats should I provide?
SVG AI, EPS, DXF as well as an e-booklet with a PDF version provide the greatest compatibility to most users and cutting equipment.
How often should I update my template library?
Check your catalogue regularly to include new models for cameras, update existing templates and update previews of products.