How to Apply Mobile Skins Perfectly Without Bubbles (Step-by-Step Guide)
The process of applying a mobile skin might appear simple, however If it’s not applied properly, dust, bubbles and misalignment could cause problems with the end result. An organized and clean application is crucial for commercial and personal usage.
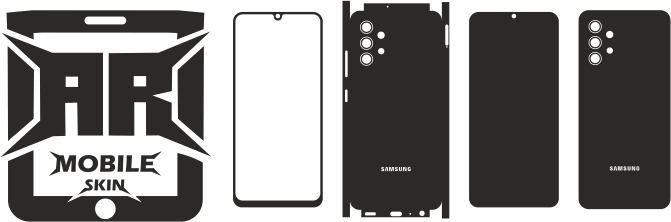
If skins that are precisely cut are made by using templates created taken from AR Mobile Skin, the application process is much simpler and more smooth.
This article describes how mobile skins may be applied without bubbles with straightforward step-bystep steps.
Why Proper Application Matters
Correct application ensures:
- The smooth, bubble-free and smooth Finish
- More adhesion
- Results that last for a long time
- Professional appearance
A poor application may cause bubbles, peeling and unhappy customers.
Tools Required for Application
Prior to starting, all the required tools must be ready.
Tools required:
- Mobile skin
- Microfiber cloth
- Alcohol wipes
- Card or squeegee
- Dust removal stickers
A good set of tools will help the procedure.
Step 1: Clean the Device Surface
The appliance should be cleaned well.
Steps:
- Clean alcohol wipes with alcohol to eliminate dirt and oil
- Cleanse with microfiber cloth
- Ensure no dust remains
A clear surface is vital to ensure good adhesion.
Step 2: Prepare the Skin
It is recommended to check the skin prior to applying.
Ensure:
- The correct model
- Proper alignment
- No damage
Preparation reduces errors during application.
Step 3: Align the Skin Carefully
Alignment is among the crucial actions.
Tips:
- Begin from one side (usually camera angle)
- Align cutouts properly
- Do not forcefully at the same time.
A proper alignment will prevent repositioning problems.
Step 4: Apply Slowly and Gradually
The skin must be applied gradually.
Method:
- Peel only a tiny portion of backing
- Press gently while applying pressure.
- Beware of applying them all at the same time
This lowers the risk of bubbles.
Step 5: Use a Squeegee to Remove Air
The squeegee, or the card, should be utilized.
Steps:
- Press from edges to center.
- Remove air trapped in the
- Use a consistent pressure
This will give you a nice final.
Step 6: Remove Remaining Bubbles
A few small bubbles could still form.
Solutions:
- Carefully push bubbles away
- Pins can be used to make small bubbles, if you need them.
- Again, press with an squeezer
The majority of bubbles can be eliminated effortlessly.
Step 7: Final Adjustment
Final results should be verified.
Ensure:
- Edges are correctly aligned
- The bubbles are gone.
- Skin is attached securely
This will ensure a flawless finishing.
Common Mistakes to Avoid
Make sure you avoid these blunders during your application:
- The application of the paint on a dirt surface
- The process is rushed
- An incorrect alignment
- Utilizing the force to the point of being excessive
This can cause damage to the skin.
Tips for Bubble-Free Application
For the most effective outcomes:
- You can work in a clean, dust-free atmosphere
- Utilize the correct lighting
- Use slowly and cautiously.
- Choose high-quality skins
The following tips can help improve your overall performance.
Why Quality Templates Improve Application
Templates affect application quality.
Benefits:
- Perfect fitting
- Simple alignment
- Reduction of bubbles
Cuts that are precise make the application simpler.
Check out: How Mobile Skin Templates Increase Cut Accuracy
How Long Does It Take to Apply a Skin?
The time to apply depends on the experiences.
- Beginning students: 10 minutes
- Users who are experienced: 5-10 mins
As you get used to it The process will become quicker.
Benefits of Proper Application
A correct application will:
- Professional style
- Adhesion that is long-lasting
- Better customer satisfaction
It increases overall value for the product.
Conclusion
The application of mobile skins with no bubbles is a breeze if you follow the right steps. A thorough cleaning process, precise aligning, along with gradual application, are the key to smooth application.
Utilizing high-quality skins as well as precise templates make the procedure even simpler. If you are able to practice and pay focus on the details the result is guaranteed to be obtained each time.
FAQs
How come bubbles appear during application?
They are typically caused by dust or air trapped.
Can bubbles be removed after application?
Yes. Many bubbles are able to be pulled out, or removed with ease.
Do I need special tools for application?
Simple tools such as cloth and a squeegee are essential.
Can beginners apply mobile skins?
Yes. When properly guided, even beginners are able to achieve great results.
How can I avoid bubbles completely?
Cleaning the surface by applying it slowly, and using appropriate equipment.